Flutter Webview Application
Creating a flutter webview application from scratch

Flutter Webview app for a mobile optimized webpage
Motivation
My website was built for mobile. It works just fine on a mobile browser. But now I wanted to have an app for the same. Though I had fairly good android development experience, but it was quite sometime ago. And also, lately I had been swarmed with articles about flutter and its usage. So it was time for me to build something with flutter.
Requirements
As mentioned earlier, my webpage was already mobile optimized and responsive. All I wanted now was a hybrid mobile app - with a login screen to specify username and then a webview screen for the users’ landing page. So my requirements were simple, and I wanted to get up and running in short time. Like all of my projects, I wanted something which is very flixible - one which would port easy to multiple platforms with minimal effort. Since flutter makes it possible for a single codebase to work as is for both ios and android, it fit my bill perfectly.
So I started with a flutter application..
Login Screen
Which just expects a username :)(yes no passwords for now), to build an unique url for the user.
Moreover I wanted to store the username so that a returning user directly lands in his landing page

Login Screen
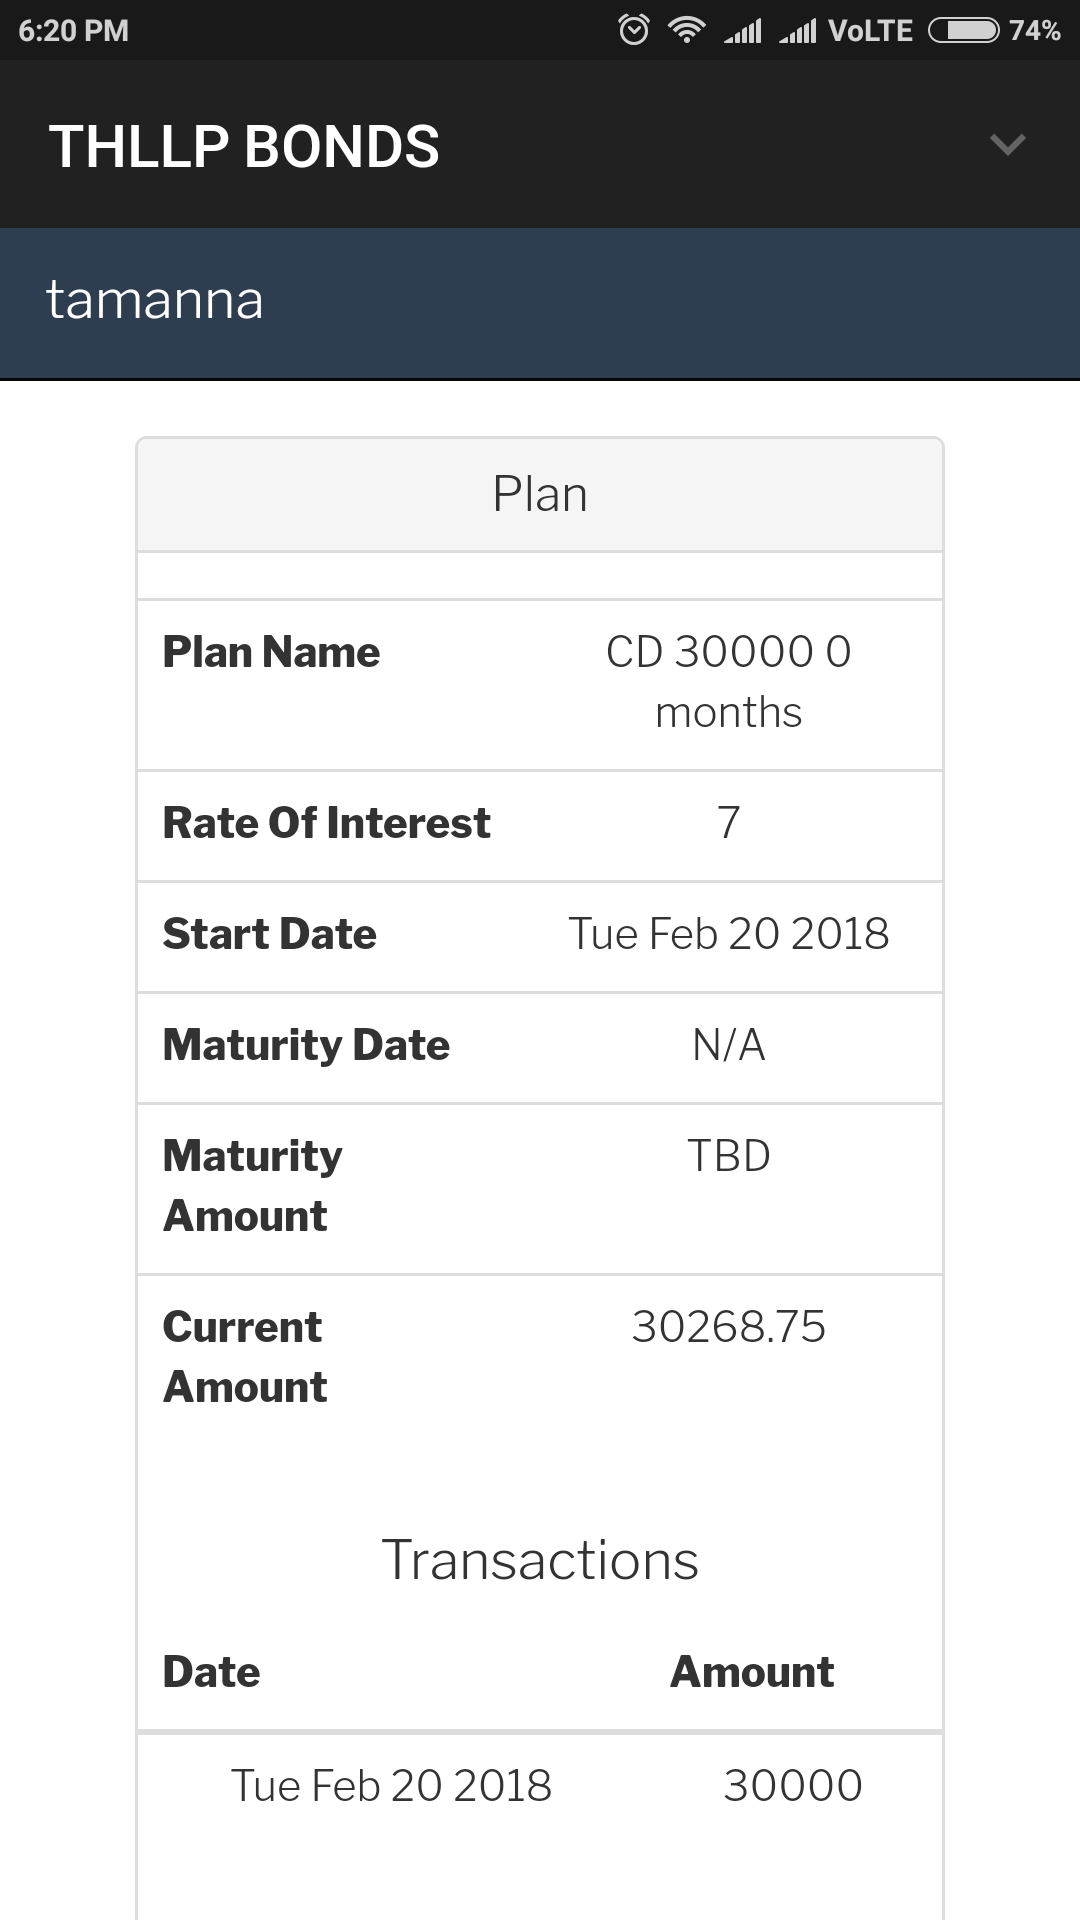
Main Screen
Here it’s just a plain webview and a button on the appbar to get back to the login screen, if user wanted to change username.

Main Screen
Let’s hack this out..
- Started with the environment setup.
- Then I implemented the hello world of flutter, following this.
At this point I already started getting a hang of basic project creation, program structure(main.dart) and running on emulator.
One thing to note is that I didn’t have any background with dart, and I felt I didn’t need one, as its mostly similar to javascript.
Now I started with the actual work on my project. Here, one suggestion is to create a new project with all the metadata as required for the final app.
I fell in the trap where I continued the changes in my hello world app, but later on changing names in android manifest xml like mentioned here, broke my app. So instead create a fresh project for ease.
Breaking down my requirements to it’s basic elements and working on it:
A login screen, with text input and a button to login (this got covered with my hello world exercise).
return new Scaffold(
                appBar: new AppBar(
                  title: new Text("THLLP BONDS"),
                  leading: null,
                ),
                body: new Center(
                  child: new Column(
                    children: <Widget>[
                      new Container(
                        padding: new EdgeInsets.all(10.0),
                        child: new TextField(
                          controller: controller,
                        ),
                      ),
                      new Row(
                        mainAxisAlignment: MainAxisAlignment.spaceEvenly,
                        children: <Widget>[
                          new RaisedButton(
                            child: new Text('LOGIN'),
                            onPressed: () {
                              _putUserName(username);
                              Navigator.of(context).pushNamed("/webview");
                            },
                          ),
                          new RaisedButton(
                            child: new Text('NEW USER'),
                            onPressed: () {
                              controller.text = '';
                              _putUserName('');
                            },
                          )
                        ],
                      ),
                    ],
                  ),
                )
            );
A webview screen to bring up my webpage. For this I followed the video guide here. But the code mentioned there turned out to be a bit old, and the syntax didn’t work as is. All the while, the approach was apt for my requirement. So I had to port the code following this.
This is where I learned how to use external plugins with flutter and its real power.
return new WebviewScaffold(
      url: url + username,
      withJavascript: true,
      withLocalStorage: true,
      appBar: new AppBar(
          title: new Text("THLLP BONDS"),
          automaticallyImplyLeading: false,
          actions: <Widget>[new IconButton(icon: new ExpandIcon(), onPressed: () {
            _putUserName('');
            Navigator.of(context)
                .pushReplacementNamed ('/');
          }),]
      ),
    );
Next I had to store user’s username, so that one doesn’t have to enter it everytime on launch. For this, with my previous background in android development, I knew I had to use some sort of equivalent to prefs in flutter.
Yes, I found a plugin for that as well here. I followed the simple usage directions, and was quickly able to integrate it in my code.
Future<Null> _putUserName(username) async {
  SharedPreferences prefs = await SharedPreferences.getInstance();
  prefs.setString('username', username);
}
Then some tricky parts..
On launch I had to read prefs and based on that, launch either the login screen widget or the webview screen widget. So I had to modify my stateful widget to return a future widget, where in I could read the prefs and return either home screen or login screen.
return new FutureBuilder<SharedPreferences>(
    future: _prefs,
    builder: (BuildContext context,
        AsyncSnapshot<SharedPreferences> snapshot) {
      if (snapshot.connectionState == ConnectionState.waiting)
        return const Text('Loading...');
      controller.text = snapshot.requireData.getString('username');
      // ignore: prefer_const_constructors
      if (controller.text.length == 0)
        return new Scaffold(
        ...
        ...
      else
        return new WebviewScaffold(
        ...
        ...
Then I had to figure out how to navigate between screens. Login->Webview; Webview->Login. I used the following approach with navigator.
For Login->Webview:
    ...
    Navigator.of(context).pushNamed("/webview");
    ...
For Webview->Login:
    ...
    Navigator.of(context)
            .pushReplacementNamed ('/');
    ...
Once logged in, my app launches in to the webview. But from there I had to implement a way to clear username and launch user login page. For this I implemented an appbar button, and in the onPressed method of this widget, I cleared the username and navigated back to the login page.
appBar: new AppBar(
      title: new Text("THLLP BONDS"),
      automaticallyImplyLeading: false,
      actions: <Widget>[new IconButton(icon: new ExpandIcon(), onPressed: () {
        _putUserName('');
        Navigator.of(context)
            .pushReplacementNamed ('/');
      }),]
  ),
Finally, since I was using navigator to move between screens, depending on the sequence - either of my pages would end up having a back navigation button. For this I just disabled the button with the following.
...
automaticallyImplyLeading: false,
...
With this my app was in final form as I wanted.
Now I had to release it to my clients :) It involves some work for signing the apk and then publish it to playstore, which I thought I will take up some other time when really required. For now, I just built the app in release form.
flutter build apk --release
And then picked up the apk from build/app/ouputs/apk/app-release.apk to install and share!
Complete code of the project is shared here. Feel free to hack it!
Bye for now, till the next hacking session..


Share this post
Twitter
Google+
Facebook
Reddit
LinkedIn
StumbleUpon
Pinterest
Email